How to – Clear Cache in Cloudflare

  1. Log In to Your Cloudflare Account.
    Visit the Cloudflare website (https://www.cloudflare.com/) and log in to your account.
  2. Select Your Website.
    In the Cloudflare dashboard, you will see a list of the websites registered in your account. Click on the website for which you want to clear the cache.

  3. Navigate to Cache Settings.
    Once you’ve selected your website, look for the settings menu. In the left sidebar, click on the “Caching” option to expand more choices, then click on the “Configuration” option.

  4. Clear the Cloudflare Cache.
    Within the cache configuration section, you will find various options related to caching. To clear the cache, follow one of these two methods:Custom Purge (Clear Individual Files):

    • Enter the specific URL of the page or resource you want to clear from the cache.
    • Click the “Purge” button.

    Purge Everything:

    • Click on the “Purge Everything” option.
    • Cloudflare will prompt you for confirmation since this will remove the entire cache of your site. Confirm the action.
  5. Wait for the Cache to Clear.
    The cache clearing process in Cloudflare will begin and may take some time, especially if you are clearing the entire cache. Cloudflare will remove all cached versions of your site.
  6. Verify Successful Cache Clearance.
    Once the clearing process is complete, you will receive a notification or a success message. Your website will now serve fresh content to visitors.
  7. Check Site Functionality.
    It is important to check that your website continues to function correctly after clearing the cache. Navigate through the pages and verify that everything is displaying as it should.

How to – Create a Database in cPanel

  1. Log in to cPanel.
  2. Navigate to the Databases Section.
    Look for the “Databases” section. Within the “Databases” section, search for and click on the “MySQL Databases” option. This tool will allow you to create and manage MySQL databases in cPanel.
  3. Create a New Database.
    Once you are in the “MySQL Databases” tool, you will see a section for creating a new database. You should follow these steps:

    Assign a Name to the Database: Choose a name for your new database. This name must be unique.

    Create the Database: Click on the “Create Database” button. cPanel will create the database and show you a confirmation that it has been successfully created.


  4. Create a User to the Database.
    Navigate to the MySQL User section, click on “Add New User,” and enter the username that will have access to the database. Similarly, set a secure password and click en “Create User” button.
  5. Assign the user to the database.
    Now assign the user to the database. This allows the user to access and manage the database. To do this, follow these steps:Assign the user to the database: Navigate to the “Add user to Database” section, select the user and the database; this will assign the user to the database.
    Manage the user’s permissions: Assign privileges to the user for the database. We recommend selecting “All Privileges” and clicking the “Make Changes” button. You can specify individual privileges as needed.

That’s it! You have successfully created a database in cPanel and assigned a user to that database. Now you can use this database to store and manage data on your website or application.

How to – Locate the error_log file in cPanel

  1. Log in to cPanel.
  2. Navigate to the “Files” Section.
    Once you’re logged in to cPanel, look for the “Files” section. Within the “Files” section, search for and click on the option “File Manager“. This tool will allow you to explore and manage your website’s files.

  3. Once you’re in the “File Manager“, you should access the root directory of your website. The error_log file is typically located in the root directory of the public_html folder.


  4. View or Download the error_log File.
    Once you’ve located the error_log file, you can do the following:

    View the file: Click on the name of the error_log file to open it and view its contents in a popup window. This will allow you to review server error logs.

    Download the file: If you want to save a copy of the error_log file to your local computer, select the file and download it.

How to – Change my MX Records in cPanel

  1. Access you cPanel account.
  2. Managing Your Domain.
    Go to the “Domains” section. Here, find and click on the “Zone Editor” menu.
    Locate your domain in the list and click on the “Manage” option next to it.

  3. Navigating to MX Tab.
    Once in the management section, look for and click on the “MX” tab.
  4. Removing Existing MX Records (if necessary).
    If you want to use a third-party mail service for your domain, you may need to remove the existing MX records.
    Find the existing MX record(s) and use the delete option to get rid of them.
  5. Adding New MX Records.
    Click on the “Add Record” button usually present in the MX tab section.
    Enter the required details for your new MX record(s), such as priority and destination, as provided by your third-party mail service.
  6. Saving Changes.
    Make sure to save any changes you’ve made before exiting the page.
  7. Setting Email Routing.
    If your cPanel has an “Email Routing” section, ensure it’s set to the correct option, like “Remote Mail Exchanger” if you’re using a third-party mail service.

The Totalitarian Regime that is Google Safe Browsing

This is an edited version of an email sent to two different Googlers apparently associated with the Safe Browsing team. It’s gotten zero response, so I’m posting it publicly with the hopes of drawing the attention of other webmasters that have experienced these issues and to hopefully attract the attention of someone at Google that can make a positive difference.

To be fair, I have no idea if I sent the email to the right person, or even to someone who is still at Google. At the same time, Google is notoriously difficult to communicate with. There are no email addresses of team members. The web form on the Safe Browsing site allows only for reporting a URL, there is no feedback form or any way to communicate directly with the team. So, here’s the email…

————
I’m not sure if you’re on this team anymore, but hopefully you can help or direct me to the right person. The Safe Browsing team has done a great job helping prevent the spread of malware but for those of us trying to fight malware in the trenches by cleaning sites and putting them back into service, Google is more like a totalitarian regime than a system of fair governance. Let me explain why it feels that way.

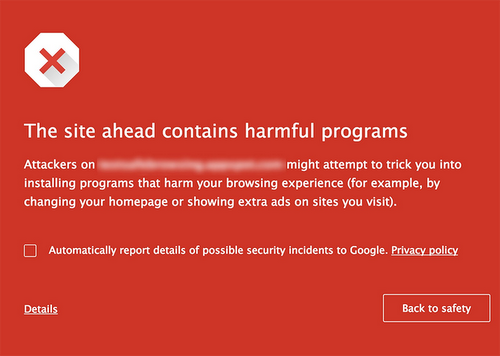
  1. We are thrown in jail without warning (website suddenly displays red screen of death)
  2. We are held without any specific charges (Search Console simply says that the site has malware and may provide an example page where malware was found, but it doesn’t point to any actual JS files hosted by the site, or links within the site that load remote payloads)
  3. There is no indication of when you’ll receive a trial or get paroled (submitting a site for reconsideration comes with zero feedback about where you might be in a queue, when you are up for reconsideration or whether your reconsideration request was accepted or rejected and, if rejected, why. You are either let out of jail or kept in there with the exact same message you got to begin with)

Google wields a tremendous amount of power in these situations and as a web developer trying to make a living and help clients make a living online, it feels like that power is being abused. As a recent example, a client’s site was hacked. We use a number of tools and processes to prevent this, but the bad guys nevertheless got through. The client’s site was red-listed by Google on a Monday morning. By around 9am that same morning, we discovered the hack, cleaned it, and submitted the site for reconsideration via Search Console.

It took 4 days for Google to remove the red screen of pain and despair. This is an e-commerce customer who lost thousands of dollars in revenue during that time. There was no communication from Google during this time. We all had to just wait and hope. There is no one to contact, no one to appeal to.

I would understand if we were the bad guys in this scenario. In that case, having the pain of your site being essentially taken offline (does anyone EVER click the “visit site anyway” button when presented with the red screen of woe and damnation in their browser?) for 4 days is arguably a just punishment.

But we are not the bad guys, we are the victims. Yes we can and will work harder to prevent this type of thing, but we are fighting cunning enemies. We need Google’s help in this fight, not to be further punished.

Can you help me restore justice to the universe in the fight against malware or help me get connected with someone at Google who can?

Thanks!
Masen

PS – I have a ton of ideas on how to improve Safe Browsing and Search Console and would be happy to share them!

New Year Resolution: Add E-commerce to Your Online Presence

Over the past year we have seen some major shifts in how people are shopping. According to Shopify, who surveyed 11 markets, 84% of consumers shopped online during the pandemic.¹

With more people sheltering in place and staying home, it’s not surprising that most people decided to shop online. This includes everything from groceries to hygiene products and other everyday essentials that were typically bought in person. People want to buy these things in a way that’s safe, convenient and fast. (more…)

6 ways to increase website conversions for the holidays

Are you ready for the holidays? With so many people shopping from home this year, it’s sure to be a record breaking year for online sales. We have 6 tips to help ensure your website is ready.

(more…)

NDIC Acquires Impulse Advanced Communications Web Hosting Business

Santa Barbara, CA, November 16, 2020 – New Directions in Computing (NDIC) is pleased to announce the acquisition of Impulse Advanced Communications’ web hosting business, beginning mid-November.

For 25 years, Impulse has offered the central coast a suite of local services including internet access, web/email hosting, and telecom services. The business has decided to discontinue web hosting services in order to focus on its core offerings – fiber internet access, cloud-based phones and meeting services, and network and server management.

After searching for a local company that could provide the right balance of support, platform, and value, Impulse looked to NDIC, with whom they’ve enjoyed a long and harmonious relationship as both colleagues in the Central Coast tech industry, as well as mutual customers.

“Web hosting is one of our core service offerings, along with web design/development, systems administration, and marketing, so the transition of Impulse’s web hosting business to NDIC was a natural choice,” said Masen Yaffee, President/CEO of NDIC. “We are pleased and excited to serve these new clients.”

Benefits of NDIC hosting services that customers can expect to enjoy are responsive, local service, single point of contact issue resolution, redundant server configurations for 99.999% uptime, and ongoing security and site maintenance.

To learn more about NDIC’s acquisition of Impulse hosting services email [email protected].

###

5 free courses that will make you better at WordPress

WordPress can be overwhelming at first glance. To help you feel more comfortable using it, we have compiled a list of five free resources to help you get better at mastering the most popular content management system.

(more…)

Website ADA Compliance

Lawsuits targeting businesses with websites that are allegedly not ADA Compliant are on the rise. This trend started a few years ago and the first round of suits were filed against large companies like Dominoes and WinDixie, claiming that their websites were inaccessible to people with disabilities. Courts have upheld these claims, leading to a rash of new lawsuits. In fact, these types of cases have rapidly grown in the last few years from 815 in 2017 to over 3200 in 2019. (more…)

Questions? We're Here.

What's New

How to - Clear Cache in Cloudflare

Log In to Your Cloudflare Account. Visit the Cloudflare website (https://www.cloudflare.com/) and log in to your account. Select Your Website.… more

How to - Create a Database in cPanel

Log in to cPanel. Navigate to the Databases Section. Look for the "Databases" section. Within the "Databases" section, search for… more

Read All

Trusted by Our Clients

UseChat